Hi guys, welcome once again to educ8s.tv, a channel dedicated to exploring DIY electronic project using popular boards like the Arduino, Raspberry pi, Esp based boards and so on.
Today, we will be taking a look at how to use a servo motor in your Arduino project. This project is easy and its an ideal project for beginners to begin to explore the cool world of electronics and by learning how to use them, you will be able to build more interesting and cool projects like robots which use a lot of servos in the future.
Servo’s are very important in electronics, they are motors with a geared output shaft which can be controlled to turn one(1) angle at a time. Asides the power supply pins(VCC and GND) to the servo motors, they require a signal pin which is used to tell the servo what angle to turn to or what degree of rotation it should make. Servo motors usually have very high torque and are used in robotics and several other applications majorly because of the ease with which their rotation can be controlled.
Servo’s have high current requirement so when using more than one servo motor with the Arduino, it is important to connect their power connections to an external power supply as the Arduino may not be able to source the current needed by the servo. Since we will be using just one servo in this tutorial its fine to power it with an Arduino.
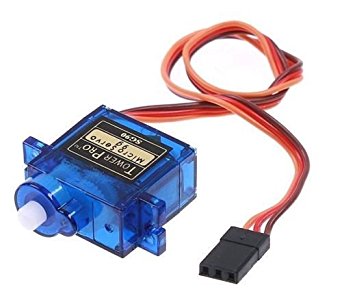
SG90 Micro Servo Motor
For this tutorial, we will be using the popular and cheap SG90 servo motor and our goal will be to rotate the servo motor from one end to the other. We will be updating this project soon to involve a 3.2″colored TFT display and an ultrasonic sensor.
Required Components and Where to Buy
The following components are required to build this project and they can be bought by through the link in front of each component. Some of the components that will be used for the project update has been included.
1. SG90 Servo ▶ https://educ8s.tv/part/SG90
2. Arduino Due ▶ https://educ8s.tv/part/ArduinoDue
3. 3.2″ Display ▶ https://educ8s.tv/part/32TFT
4. Distance Sensor ▶ https://educ8s.tv/part/HCSR04
5. Cheap Arduino Uno ▶ https://educ8s.tv/part/ArduinoUno
6. Wires ▶ https://educ8s.tv/part/Wires
Schematics
Connect the servo to the Arduino as shown in the Schematics below.
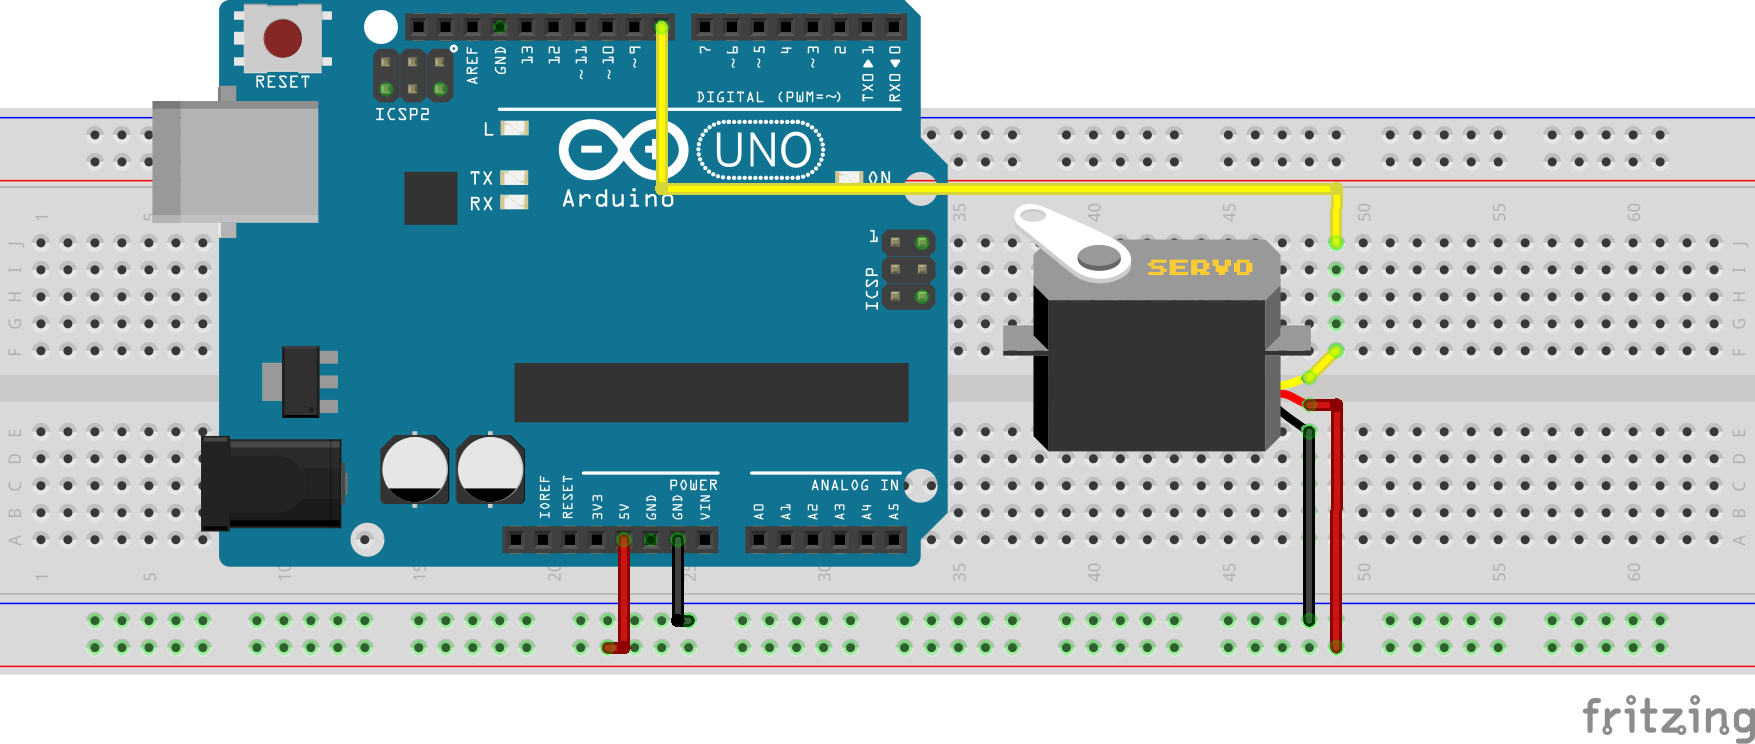
Schematics
The connection with Arduino is extremely easy has the servo has just three pins/leads and the connection to the Arduino is also described below.
Servo Wires ▶ Arduino

Red(VCC) ▶ 5v

Black/Brown(GND) ▶ GND

Yellow/Orange(Signal) ▶ D8
It is important to note that the signal pin for the servo motor needs to be connected to a PWM pin on the Arduino as the servo angles are controlled by sending PWM signals to the servo motor through the signal wire.
Code
The code for this project, just like the schematics is fairly easy. It is heavily reliant on the servo.h library which comes pre-installed with the Arduino IDE. The goal implemented by the code is simple, turn the servo motors in a different direction using different angles to demonstrate its capabilities.
To do an explanation of the code, as usual, The first thing we do is include the libraries we will be using i.e the servo.h library.
#include <Servo.h>
Next, we create an object of the servo library
Servo servo;
Next, we move proceed to the void setup function where we attach the servo object to a digital pin and set the servo angle to 0. This is known as centering the servo.
void setup() {
  servo.attach(8);
  servo.write(angle);
}
Next, is the loop function. To turn make the servo rotate to a particular degree, we use the servo.write() function to write the degree of rotation we desire to the servo. We used the function to turn the servo from one to the other and back.
void loop()
{
 // scan from 0 to 180 degrees
  for(angle = 10; angle < 180; angle++)
  {
    servo.write(angle);
    delay(15);
  }
  // now scan back from 180 to 0 degrees
  for(angle = 180; angle > 10; angle--)
  {
    servo.write(angle);
    delay(15);
  }
}
The full code for the project can be downloaded through the download link below.
[adsense]——————–
CODE OF THE PROJECT
——————–
Upload the code to your Arduino and you should see the servo start rotating! as shown in the video. It is that easy!
That’s it for today’s tutorial, thank you for watching/reading. As promised, I will post an update to this project using the cheap and big 3.2″ colored TFT display module and the Ultrasonic sensor. I will also be using the servo in many robotics projects very soon so stay tuned!
SUBSCRIBE ON YOUTUBE
——————–
Never miss a video: Subscribe to educ8s.tv
servo_motor_control:14:7: error: ‘angle’ was not declared in this scope
for(angle = 10; angle Preferences.
Hello! Can you help me with a solution for this error? Thank you so much in advance!
before setup you have to declare
int angle = 0;
//correction
#include
Servo servo;
int angle = 0;
void setup() {
servo.attach(8);
servo.write(angle);
}
void loop()
{
// scan from 0 to 180 degrees
for(angle = 10; angle 10; angle–)
{
servo.write(angle);
delay(15);
}
}
//Error free code
#include
int angle;
Servo servo;
void setup() {
// put your setup code here, to run once:
servo.attach(8);
servo.write(angle);
delay(15);
}
void loop() {
// put your main code here, to run repeatedly:
for(angle=0 ; angle=0 ; angle–)
{
servo.write(angle);
delay(15);
}
}
#include expects “FILENAME” or it shows error like this?
kumaran try this
#include
Servo servo;
int angle= 0;
void setup() {
servo.attach(8);
servo.write(angle);
}
void loop()
{
// scan from 0 to 180 degrees
for(angle = 10; angle 10; angle–)
{
servo.write(angle);
delay(15);
}
}
dude, this didnt even work for me, i did exactly what it told me to do. im just trying to learn arduino stuff so i can build my own robot
Like!! Really appreciate you sharing this blog post. Really thank you! Keep writing.
Thank you, to fix the declared angle thing you just have to get rid of it
#include
Servo servo;
int angle= 0;
void setup() {
servo.attach(8);
servo.write(angle);
}
void loop()
{
// scan from 0 to 180 degrees
for(angle = 10; angle 10; angle–)
{
servo.write(angle);
delay(15);
}
}