Dear friends welcome to the Seeeduino Xiao Review. I am very excited because today I am going to show you this tiny Arduino compatible board, the Seeeduino Xiao, which despite its small size is quite capable and it requires a tiny amount of power to operate. Let’s start.
Intro to the Seeeduino Xiao Review
I discovered the Xiao board on Banggood.com a few weeks ago and I decided to give it a go. It costs around $6 and you can get it from the link below.
Seeeduino XIAO Microcontroller SAMD21 Cortex M0+ Compatible with Arduino IDE Development Board
To be honest, the main reason I got this board is to try to program it using CircuitPython and not Arduino. It is one of the cheapest and smallest boards than can run CircuitPython and I thought it would be a good idea to test it. In this video, I am going to show you how to use this board with Arduino though since after my tests I believe this board is better suited for Arduino and not CircuitPython. I will prepare another video about the Xiao board and CircuitPython in a few weeks.
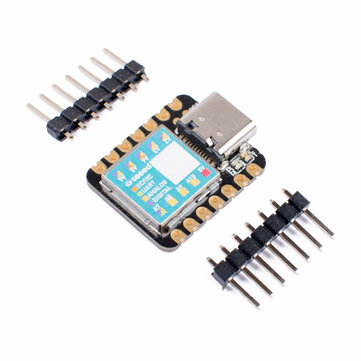
The board as you can see is tiny. It is the smallest Arduino compatible board I have ever used. It is about 2cms long. Only if you see it next to some other popular boards you can understand how small this board is. I have placed several popular boards next to the Xiao board and you can clearly see the board is very small. The board is way smaller than the Arduino Pro Mini as you can see here.
Great, we now have a tiny board to work with, but how fast it is. The board features a 32 bit ARM M0 core which operates at 48MHz. It does not offer WiFi or Bluetooth but it offers 32Kb of RAM memory and 256Kbs of FLASH memory. It also offers 11 GPIO pins, 11 Analog Pins, I2C, SPI and UART interfaces, one DAC output Pin and last but not least a USB type-c connector to power the board and download code to it. The board uses 3.3v logic levels, so be careful not use 5V logic levels with it. As you can see the board, despite its small size outperforms the Arduino Uno, Nano and Mini in every spec. Amazing stuff! This board is quite capable.
Let’s now compare this board with the ESP32 and the ESP8266 boards. As you can see, the Xiao board is not as capable as these boards. The ESP32 is a beast and it costs about the same, so why to buy the Xiao board instead? Well, to find out keep watching.
Enough with the specs. Let’s now use the Xiao board for the first time. We are going to use the Arduino IDE. First of all, we have to add the Seeeduino Xiao board to Arduino IDE. From the main menu, we go to File-> Preferences and we add this URL to the Additional Boards Manager URLs: https://files.seeedstudio.com/arduino/package_seeeduino_boards_index.json
Next we go to Tools -> Board -> Boards Manager and we search for the XIAO board. We click install and we are almost ready. After the software package is installed we have to select the Xiao board to use it. From the Menu we select Tools -> Board – SEEED SAMD -> Seeeduino Xiao. Next we select the port we have connected the board to and we are ready to program the board for the first time.
Let’s load the start Blink sketch. From the menu we select File -> Examples -> Basics -> Blink . After the sketch is loaded all we have to do is to press the Upload button. After a few second the LED of the Xiao board will start blinking! Our first program is now running in the Xiao board. If the board you got already runs a blink sketch, try modifying the duration the LED stays on like this and try to program the board, just to be sure that everything is working as expected.
Now that we know how to program the board let’s build something useful with it and also test to see if the Arduino libraries we often use work with this board as well. Let’s add an OLED display, and a DS18B20 sensor and build a simple thermometer. You can find links to all the parts I use in the description of the video below. The total cost of this project is around $12, and it won’t take us more than 5 minutes to build.
Parts Needed
? Arduino Xiao: https://educ8s.tv/part/xiao
? SSD1306 OLED: https://educ8s.tv/part/OLED096
? DS18B20 Temperature Sensor: https://educ8s.tv/part/DS18B20
? Breadboard: https://educ8s.tv/part/SmallBreadboard
? Wires: https://educ8s.tv/part/Wires
The display uses the I2C interface, so we only need to connect power and two wires to the I2C pins of the XIAO board. The temperature sensor only needs power and a signal wire which is connected to digital pin 10.
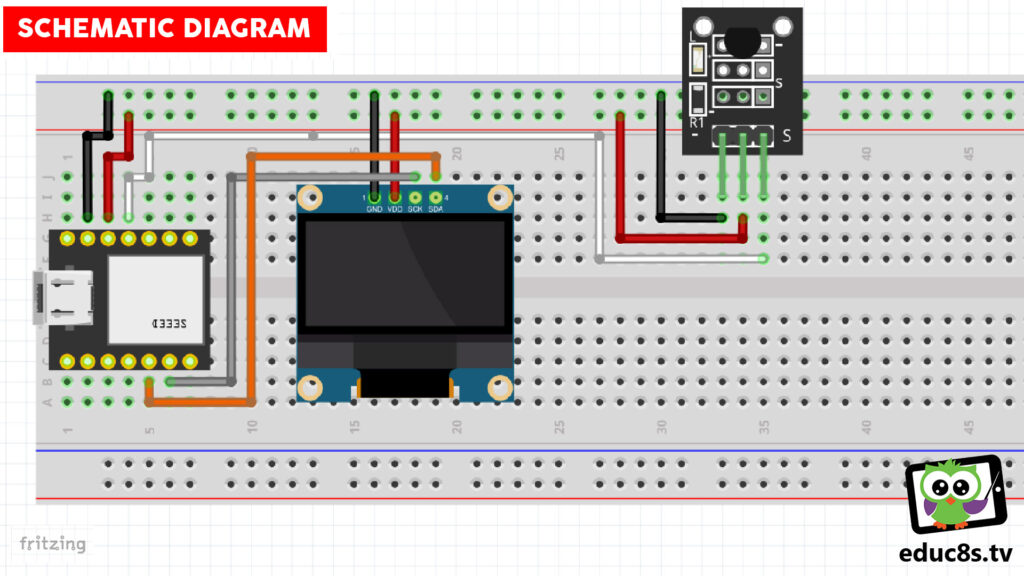
If we upload the code I have prepared to the Xiao Board it will display the temperature it reads from the sensor. We are using the Adafruit GFX library, the Adafruit SSD1306 library and the Dallas Temperature Library in this project. As you can see the libraries we use support the XIAO board and everything works as expected! As always you can find the code of this project in a link in the video description. If we compare the readings of our project to the readings of a commercial thermometer we can see, we get the same results! Cool!
Before we go, I would like to talk for a minute about the power consumption of the board. I provide power to the board via a 3.3V power supply and as you can see, now that the board is in Sleep mode it requires only 0.95mAs of current. This is so cool! If I press the button, the board wakes up and it now requires around 12.4 mA of current to operate. If we remove the power LED of the board which stays on all the time we can further reduce the power consumption of the board! I will try that and I will post another detailed video about the sleep mode of this board, so stay tuned!
To sum up, this is an amazing board. If you don’t need Wifi or Bluetooth and you need low power consumption, or small size or both use this board. Else you can use the ESP32.
Nick: Your statement regarding libraries was critical important as I did the Seeeduino on a project that you had using the TFT LCD 1.8″ 128 c 160 with the ST7735 driver chip and the Ucglib. It would not compile with that library and the error shown related to the library not knowing the Seeeduino – I think!
I did check the github library page but couldn’t find any email for the developer; can you suggest a way to contact Ucglib developer regarding the Seeeduino?