Arduino ST7920 Tutorial
Dear friends welcome to another tutorial! In this Arduino ST7920 tutorial, we are going to take a first look at this big LCD display and we are going to build a temperature and humidity monitor with it.
I always wanted to find out a display similar to the display my 3D printer uses because it is big and inexpensive so it can be very useful for many projects. After looking around, I discovered that display my printer uses is this one. A big 3.2” display with the ST7920 driver and a resolution of 128×64 pixels. Cool! As you can see it is much bigger than most of the displays we were using so far in our projects, so it will be useful in many future projects. It only costs around $6!
You can get it here → https://educ8s.tv/part/ST7920
Connection with Arduino
Let now see how to use it with Arduino. I am going to use an Arduino Uno today but it works with many Arduino boards.
The display uses the SPI interface to communicate with the microcontroller so we need to connect it to the hardware SPI pins of the Arduino board.
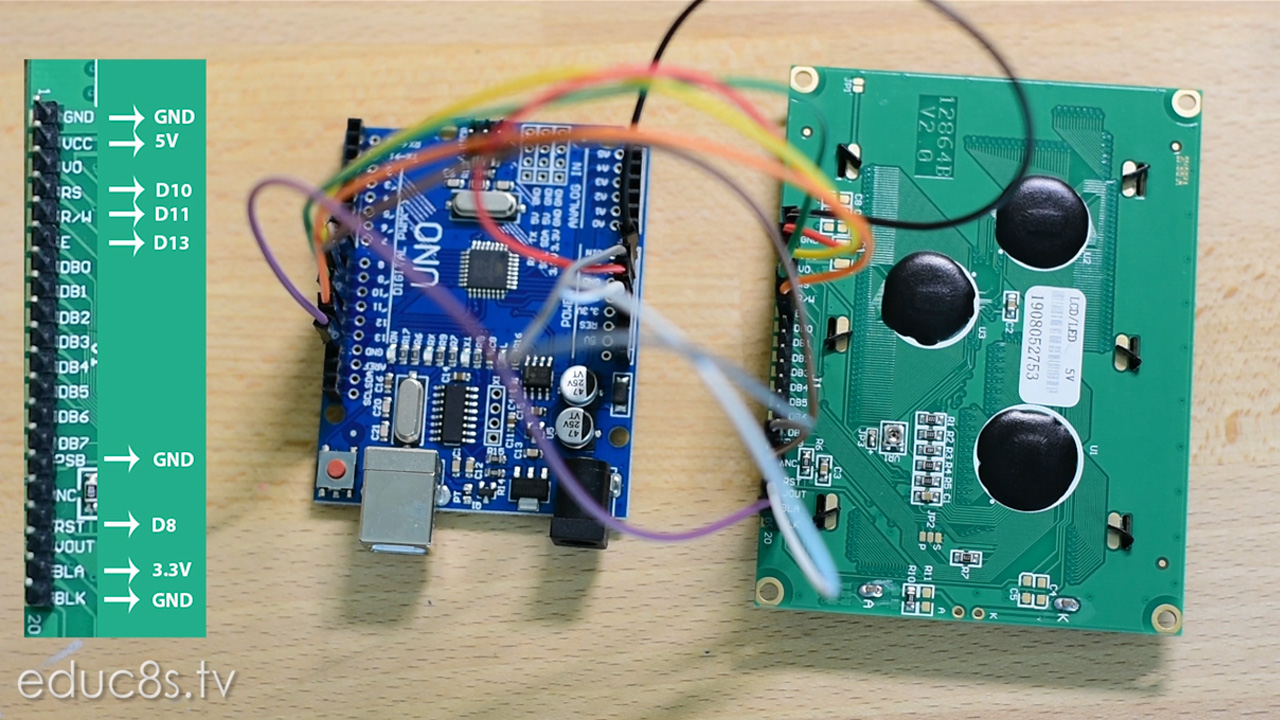
As you can see, the display has many pins to connect, but don’t worry we don’t need to connect all these pins, just 9 of them and only 4 of them to the digital pins of the Arduino Uno board.
The first pin which is GND goes to Arduino GND. The second pin which is Vcc goes to the Arduino 5V output. RS pin goes to digital pin 10. R/W pin goes to digital pin 11. E pin goes to digital pin 13. PSB pin goes to GND, RST pin goes to digital pin 8, BLA goes to the 3.3V output of the Arduino and the BLK pin goes to GND. That’s it our display is ready to use!
We can make our life easier if we hardwire all the GND pins of the display together.
[adsense]
Library for the display
Now let’s see the software we need to drive this display.
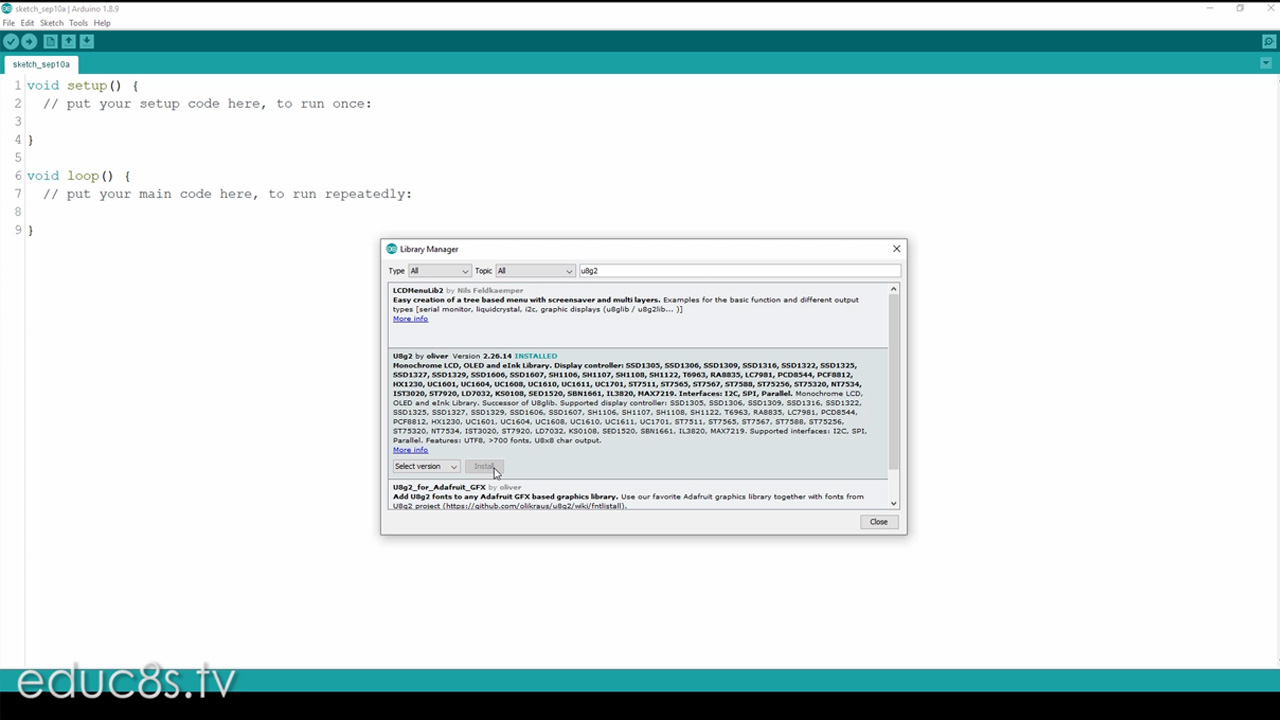
I am going to use the u8g library to drive this display. First of all, let’s install the library. We open the Arduino IDE and from the menu, we select Sketch → Include Library → Manage Libraries and we search for the U8G2 library. We select it and we press install! That’s it, our library is ready to use.
Now let’s go to File → Examples and from the examples provided with the library let’s run the GraphicsText example. We only need to make one change to the sketch before uploading it to the board. Since the U8G library supports many displays we have to select the appropriate constructor for our display. So we search the code for “ST7920” and from the available constructors, we select to use the HW_SPI one. We uncomment this line like this and we are ready to upload the sketch to the Arduino. After a few seconds, the sketch is up and running.
If you can’t see anything at the display, you have to adjust the contrast of the display using this small potentiometer which is located at the back of the display.
Now let’s watch the demo sketch for a few seconds. As you can see, this example sketch demonstrates the capabilities of the library and of the display. We can achieve some cool animations with this display, it is quite capable. That’s why it is used in so many 3D printers.
Let’s build a weather station
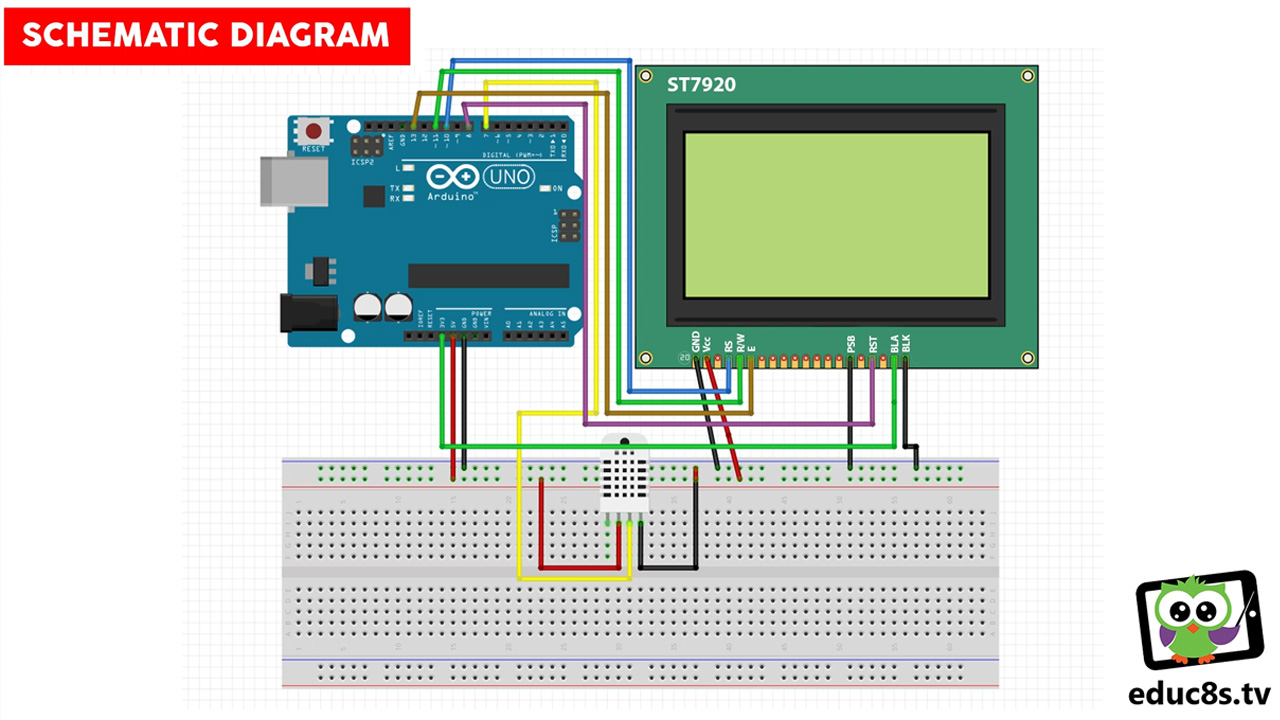
Let’s now build something useful. Let’s connect a DHT22 Temperature and Humidity Sensor to the Arduino. We only need power and a signal wire which I connect it to digital pin 7. To make things easier I have also used a small breadboard. You can find the schematic diagram attached here.
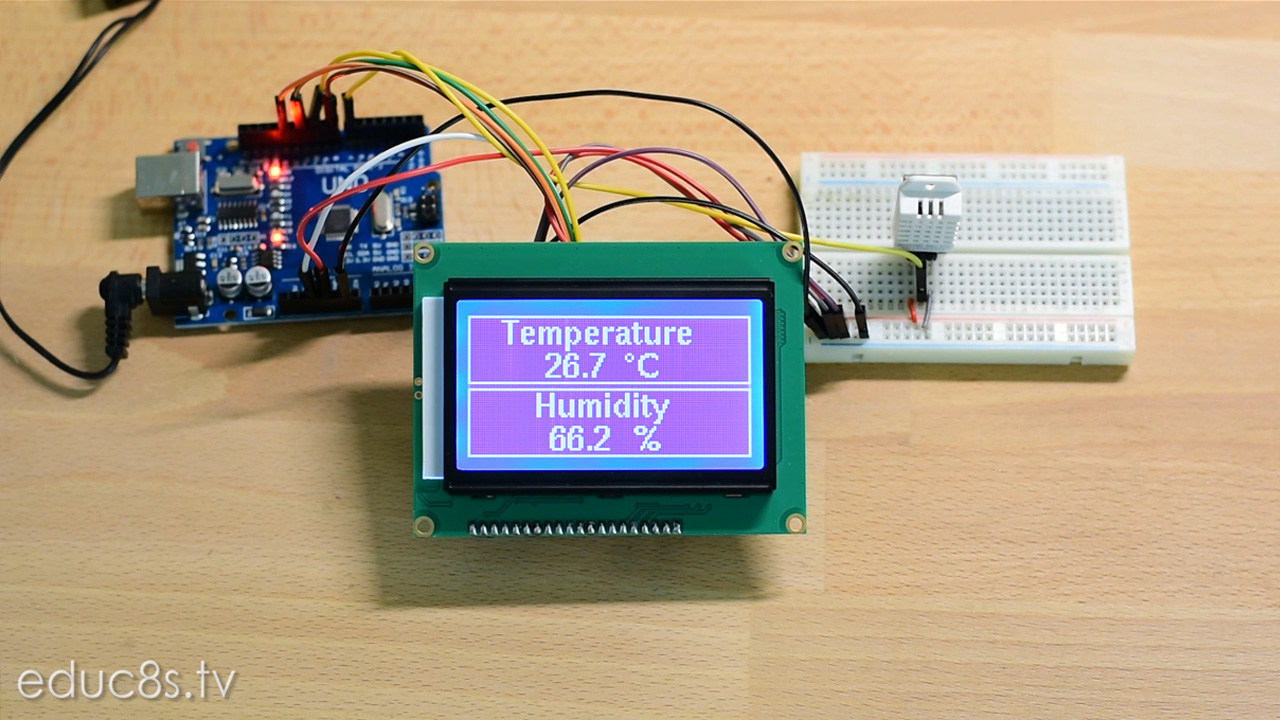
As you can see the project is working fine and it displays the temperature and the humidity in real-time.
Let’s now take a quick look at the code of the project. With just 60 lines of code, we can build a project like this! How cool is that! All we need to do to use the display is to use this constructor:
U8G2_ST7920_128X64_1_HW_SPI u8g2(U8G2_R0, /* CS=*/ 10, /* reset=*/ 8);
initialize the display in the setup function:
u8g2.begin();
u8g2.enableUTF8Print();
u8g2.setFont(u8g2_font_helvB10_tf);
u8g2.setColorIndex(1);
and then all we do is to draw the frames and the strings for temperature and humidity:
u8g2.drawFrame(0,0,128,31);
u8g2.drawFrame(0,33,128,31);
u8g2.drawStr( 15, 13, "Temperature");
The last we have to do is to read the temperature and the humidity from the sensor and display the reading on the screen as well.
void readTemperature()
{
  float t = dht.readTemperature();
  dtostrf(t, 3, 1, temperature);
}
As always you can find the code of the project attached here.
——————–
CODE
——————–
——————–
SUBSCRIBE ON YOUTUBE
——————–
Never miss a video: Subscribe to educ8s.tv
Hello!
I would like to discuss the issue of cooperation with you. Interested in placing a banner on Your site on a permanent basis. The banner theme is mobile phones and gadgets.
I will wait for Your response to my email. mail. Sincerely, Anna
Hi, please help, I tried this project with Arduino Mega 2560, I configured wires to same pins as described, but nothing on screen, what I’m doing wrong ?
Hi. Same is the case with me. Not working with mega.
Sigur ca nu merge. Ar fi bine sa folosesti alt constructor, cu mentiunea ca : Arduino Mega 2560, are Spi bus- ul legat la pinii 50,51,52,53.
MISO = 50
MOSI = 51
SCLK = 52
SS = 53
In lista de constructori se modifica corespunzator pentru a avea efect :
U8GLIB_ST7920_128X64_4X u8g(52,51,53);
La mine, a functionat.
const char DEGREE_SYMBOL[] = { 0xB0, ‘\0’ }; error line